About a year ago, I was commissioned to make a interpretive portrait of an executive for a high-profile client. After spending hours preparing and lighting the set, the subject arrived and within 15 minutes the shoot was over. Judging only by the LCD on the camera, I had captured something very close to what I’d envisioned. But when it came time to process the RAW files on the computer, not a single image on the monitor was as sharp as I expected.
I knew they should be sharp because I’d been very careful to set the autofocus to the subject’s eye and to maintain that focus—especially since I was shooting nearly wide open. I also knew that the premium, fixed-focal length lens I’d chosen was brilliant because I’d made several other razor sharp portraits with it. The only difference in this particular optical chain was the brand new camera I was using.
“All of my lenses now make sharper pictures. Every single one.”
After some experimentation, I discovered that this specific body and lens combination needed a slight adjustment to go from acceptably sharp, to razor sharp. The difference in the resulting pictures after such a simple change was amazing. But this really got me thinking about how many of my other lenses might look entirely different if I made a similar change. The answer: All of my lenses now make sharper pictures. Every single one.
The adjustment I made is called AF Fine Tune and it allows you to set each lens and body combination to optimum accuracy. The reasons you might need to do this are measured in microns, but thankfully it’s adjusted with a simple push of a button. In the film days we’d just live with the inaccuracy, but with digital cameras we can now optimize our gear to near perfection.
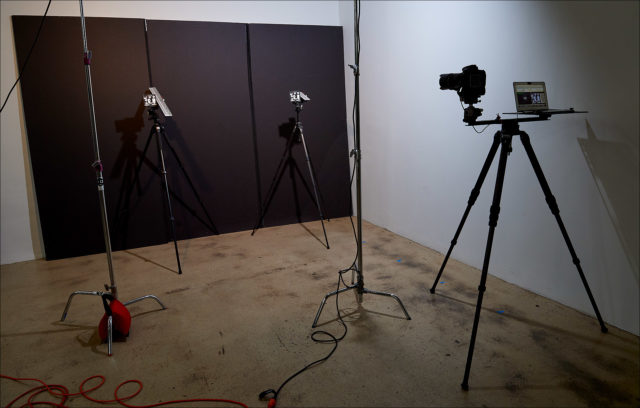
It is possible to perform the adjustment using trial and error, but there’s a far easier, more accurate, and less time-consuming method simply by using a well designed focus target made by a company called LensAlign and some amazing analytical software called FocusTune.
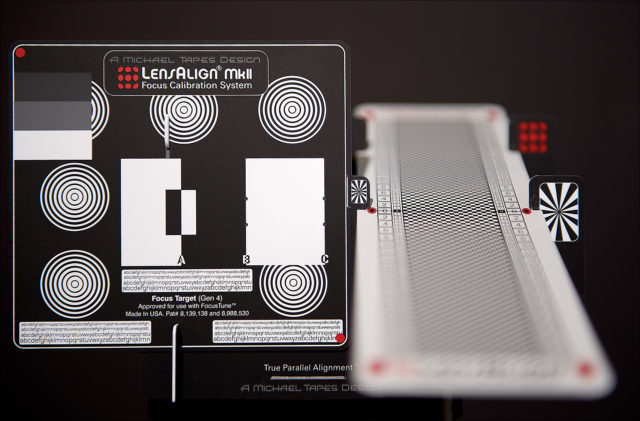
The LensAlign target and Long Ruler
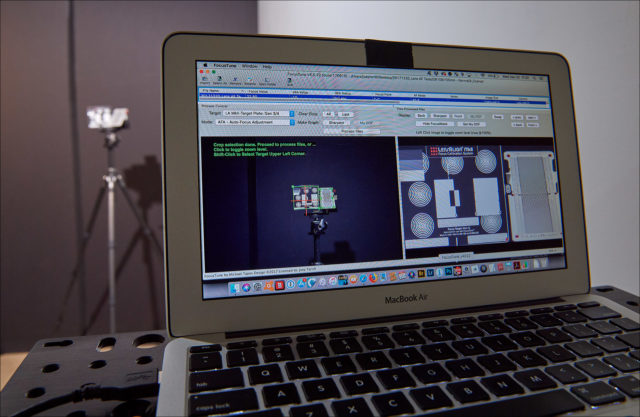
The basic steps are very simple: You begin by photographing the target at evenly-spaced AF Fine Tune adjustments. The resulting images are then loaded into the software and it produces a graph indicating where the adjustment should be set. That number is then entered into the camera’s menu setting, and you’re done.
In practice, I found that a few more steps and procedures made a world of difference in the accuracy of the adjustment—plus, with some additional testing, I was also able to determine for each lens which f/stop would yield the absolute sharpest image.
To make the process fast, consistent and repeatable, I developed a workflow that eliminated errors and organized the data so that it could easily be analyzed and archived. I also discovered a few tips through trial and error:
- Before you begin, construct a spreadsheet or some other way to record the results that the software produces. Having all of your lens settings in one place makes it easy to program each one into the appropriate camera body.
- If possible, use an off-camera Speedlight to evenly illuminate the target and maintain consistent lighting throughout the testing. The Speedlight will also freeze any camera or target movement. This is particularly important when testing macro lenses, or lenses that are 200mm or longer.
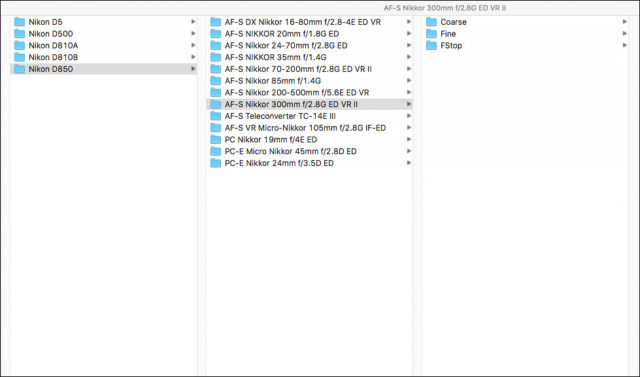
- Tether the camera to a computer so that you can see the results in real time while directing the captures into a separate folder for each camera body. Within each camera body folder, create a sub-folder for each lens you wish to test. Within each lens folder, create three sub-folders and label them Coarse, Fine, and FStop. (You can create these folders once and then repeatedly copy them as needed.)
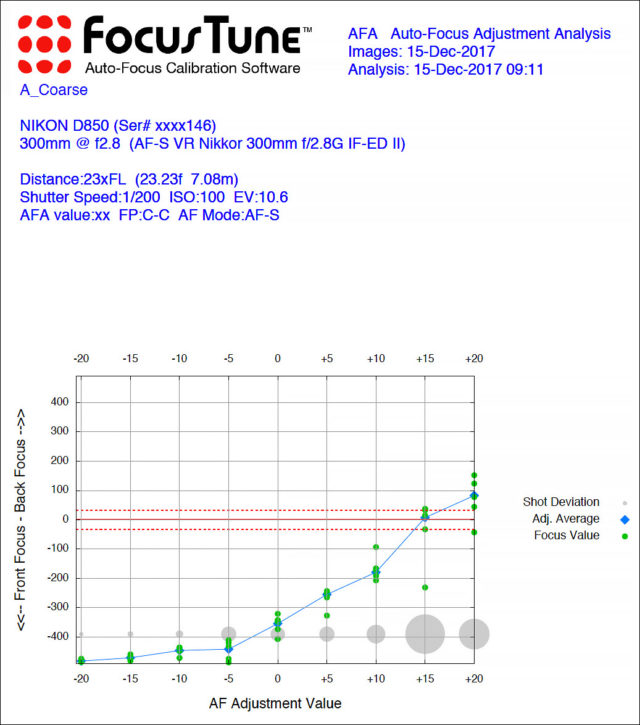
- Space the initial AF settings in 5-step increments. For example, -20, -15, -10, -5, 0, +5, +10, +15, +20.
- Be sure to shoot JPEG files (no RAW) and capture 3 images at each AF Fine Tune setting. Between each capture, defocus the lens manually toward closer focus and then use the auto-focus on the camera to refocus the lens. Doing it this way forces the camera and lens to refocus on the target each time.
- Load the 27 resulting images into the software and analyze the graph. This initial (Coarse folder) test will reduce the scale of the testing to a narrower and more precise range.
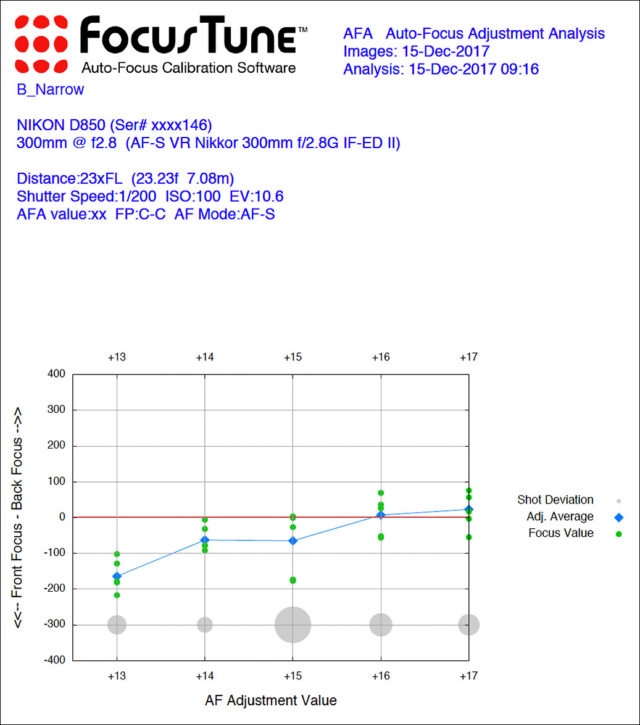
- Perform a second (Fine folder) test in the narrower range demonstrated by the first test. For example, if the first test showed between +13 and +17 to be optimal, perform a new test at +13, +14, +15, +16, +17, which will generate a more specific graph than the first test. I found that 5 captures each in this second test gave me a nice sample of lens data to work with.
- Load the second test into the software and analyze the graph. It should clearly indicate the optimum setting. Record that setting in the spreadsheet.
- Even manual lenses can be tested for focus accuracy. By using the Electronic Rangefinder (the indicator inside the viewfinder that confirms proper focus), you can test as you would with AF lenses and then set the AF Fine Tune adjustment accordingly.
- Because each lens needs to be at a specific minimum distance from the target, I found it easier to establish the alignment for a particular lens and then test every body with that specific lens before moving the tripod—rather than testing the lenses sequentially with each body. This enabled me to make the fewest alignment changes between the camera and the target.
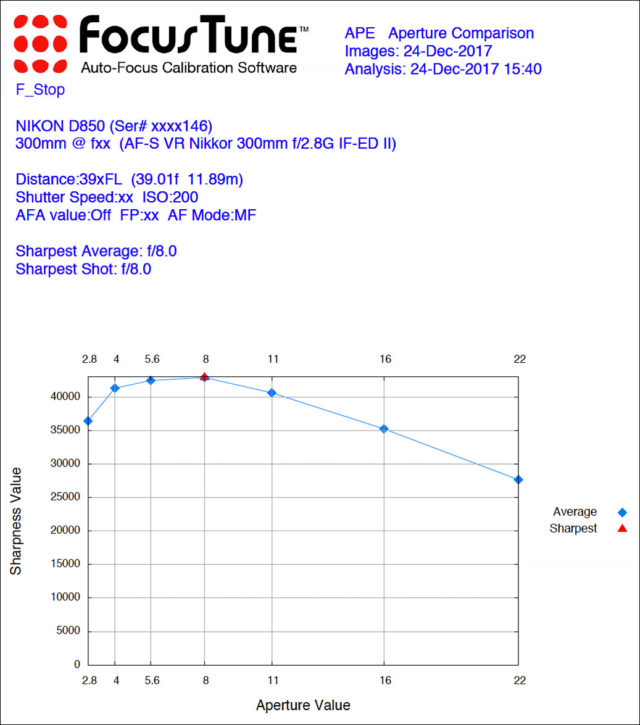
- Finally, using the FocusTune software, it’s also possible to determine the optimum f/stop for each lens (FStop folder). Simply make an exposure for each f/stop (while compensating for the exposure as you do) and then allow the software to plot the performance and record the results in the spreadsheet. As with the AF testing, FocusTune produces a graph that clearly indicates the sharpest range of the lens and the ultimate f/stop for sharpness. Optionally, you can subsequently mark each of your lenses with the f/range and optimum f/stop so you’ll know at a glance where each performs the best.
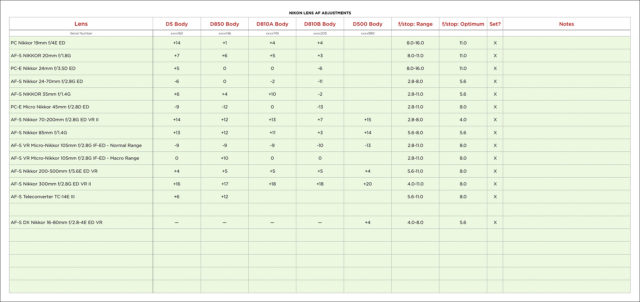
Sample spreadsheet for recording the test results. (These adjustments apply uniquely to my specific camera and lens serial numbers. Your results will be entirely different.)
Click to Enlarge
It is absolutely essential that this testing be performed methodically and carefully—particularly the target alignment and lens to target distance. There are several videos on the LensAlign site that clearly explain the entire process as well as a lens to target calculator under the distance tool tab to help you establish the proper distance for each lens.
Throughout this process, I’ve discovered that nearly every lens and body combination I own produces sharper images than it ever did before. Not only that, I now know exactly which f/stop to choose for optimum sharpness from any lens. It’s incredibly important knowledge about my gear that I’m very glad to possess.
Joey Terrill is a Los Angeles-based photographer with clients that include American Express, Coca-Cola, Disney, Golf Digest, Major League Baseball, Red Bull, and Sports Illustrated. He teaches workshops and speaks at seminars including the Summit Series Workshops, WPPI, Atlanta Photojournalism Seminar, UPAA Symposium, World in Focus, and Nikon School.

